 Yes! Time for a new Pumpkin challenge! This month we're all about the pretty little package, lol, at My Pumpkin Challenge #1114 - Give It Pretty! So, I have to admit, I'm pretty intrigued by the possibilities of these cute "pie-shaped" boxes that came in this month's Paper Pumpkin. How could I not love a kit called "Sweet As Pie?" I think the colors are a bit intimidating - there's almost TOO MUCH choice, lol, not something I'd ever have thought I'd say! So I decided to take a bright alternative, and go all Strawberry Slush, all the time! I think it really brightens things up, and the cute box is the perfect size for a snack and a gift card for one of our teachers! Hint: The Stretch Ruffle Trim is prefect for tying closed the box without using anything I have to rip through to get into it - yay! Paper Pumpkin - Sweet As Pie; plus, Paper Pumpkin Framed Love; Whisper White & Strawberry Slush CS; Strawberry Slush Ink; Deco Labels Framelits; Essentials Piercing Template; Stretch Ruffle Trim in Strawberry Slush; Heavy Baker's Twine in Strawberry Slush; Boutique Detail Embellishment in Strawberry Slush. 
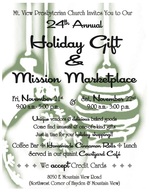 I'm so excited to invite everyone to this year's 24th Annual Holiday & Gift Show at Mountainview Presbyterian!
This year's show is scheduled for November 21, from 9 AM to 5 PM, and Saturday November 22 from 9 AM to 3 PM. Make sure to come early and get your cinnamon roll orders in! I've also heard they have several exciting new vendors - I can't wait to see! You can click here or on the picture to get your own flyer - see you there!
2 Comments
 Here we are with one last round of My Pumpkin Challenge #1014 - Sweets & Treats - just in time for the big night! I'm finally using my very last awesome Blackberry Bliss box from the Wish Big kit - sob, so sorry to see it go! But I HAVE to stop hording stampin' stuff! Anyway, the white stripes are perfect for slipping in decor and sentiments, and purple, orange and black were MADE for Halloween! I ended up heat-embossing my stamping - the box surface was a little slick for just inks. But I did have fun using up some of my stickers! Yay! My secret confession: I am SO glad to be done with the burlap - I've had burlap lint in some pretty unmentionable places all month, lol. I even had to vacuum my stamp-n-scrub! Argh! Paper Pumpkin Boo-tiful Bags & Wish Big; plus, Black Staz-On Ink; Black Embossing Powder; Teeny Tiny Wishes Stamp Set. 
 I'm so excited to invite everyone to this year's 24th Annual Holiday & Gift Show at Mountainview Presbyterian!
This year's show is scheduled for November 21, from 9 AM to 5 PM, and Saturday November 22 from 9 AM to 3 PM. Make sure to come early and get your cinnamon roll orders in! I've also heard they have several exciting new vendors - I can't wait to see! You can click here or on the picture to get your own flyer - see you there! 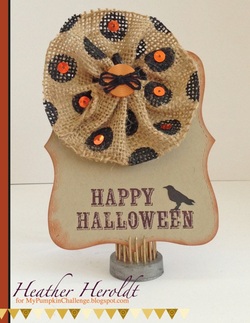 Time for more Sweets & Treats with My Pumpkin Challenge #1014! Sorry, no gummy eyeballs this week, I've decided to go sugar-free! I had a blast putting together this cute pin, which can be worn as is, or on a hair-band, maybe. With your trusty hot glue gun in hand, it comes together in a snap! Begin by turning your burlap treat bag of choice inside out - I've found this is the easiest way to snip off those side seams neatly, leaving you with the maximum amount of burlap to play with. Unfold the trimmed bag so that you have one long strip, half of which has the black pattern on it. I also go ahead and un-pick the hem of the bag "flap" for just a tad extra length. Iron your strip so you don't have to deal with any creases. Once I had it ironed, I took a good hard look at my edges, and straightened them with careful trimming. I then cut in half lengthwise, and dosed all cut edges with Fray Check, a sewer's best friend! For this pin, I wanted to show the black dots, so I also snipped off just the patterned part. Once the fray-check was dry, I punched a 1 5/8" circle from Crumb Cake CS to use as my base. I added a healthy blob of hot glue, and began apply my burlap, pressing the pleats into the glue. When it was time to add the second strip, I folded UNDER the ends so it looked more like a continuous ruffle. I glued a button at the center to cover any indiscretions there, and glue-dotted some random sequins for extra sparkle. A pin-back is glued to the back. I threw together a quick card to attach the pin to for gifting. Fun! Paper Pumpkin Boo-tiful Bags; plus, Crumb Cake CS; Brights Button; Blackberry Bliss Ink; Bigz Top Note Die. Also used hot glue and glue dots, and a basic pin-back!  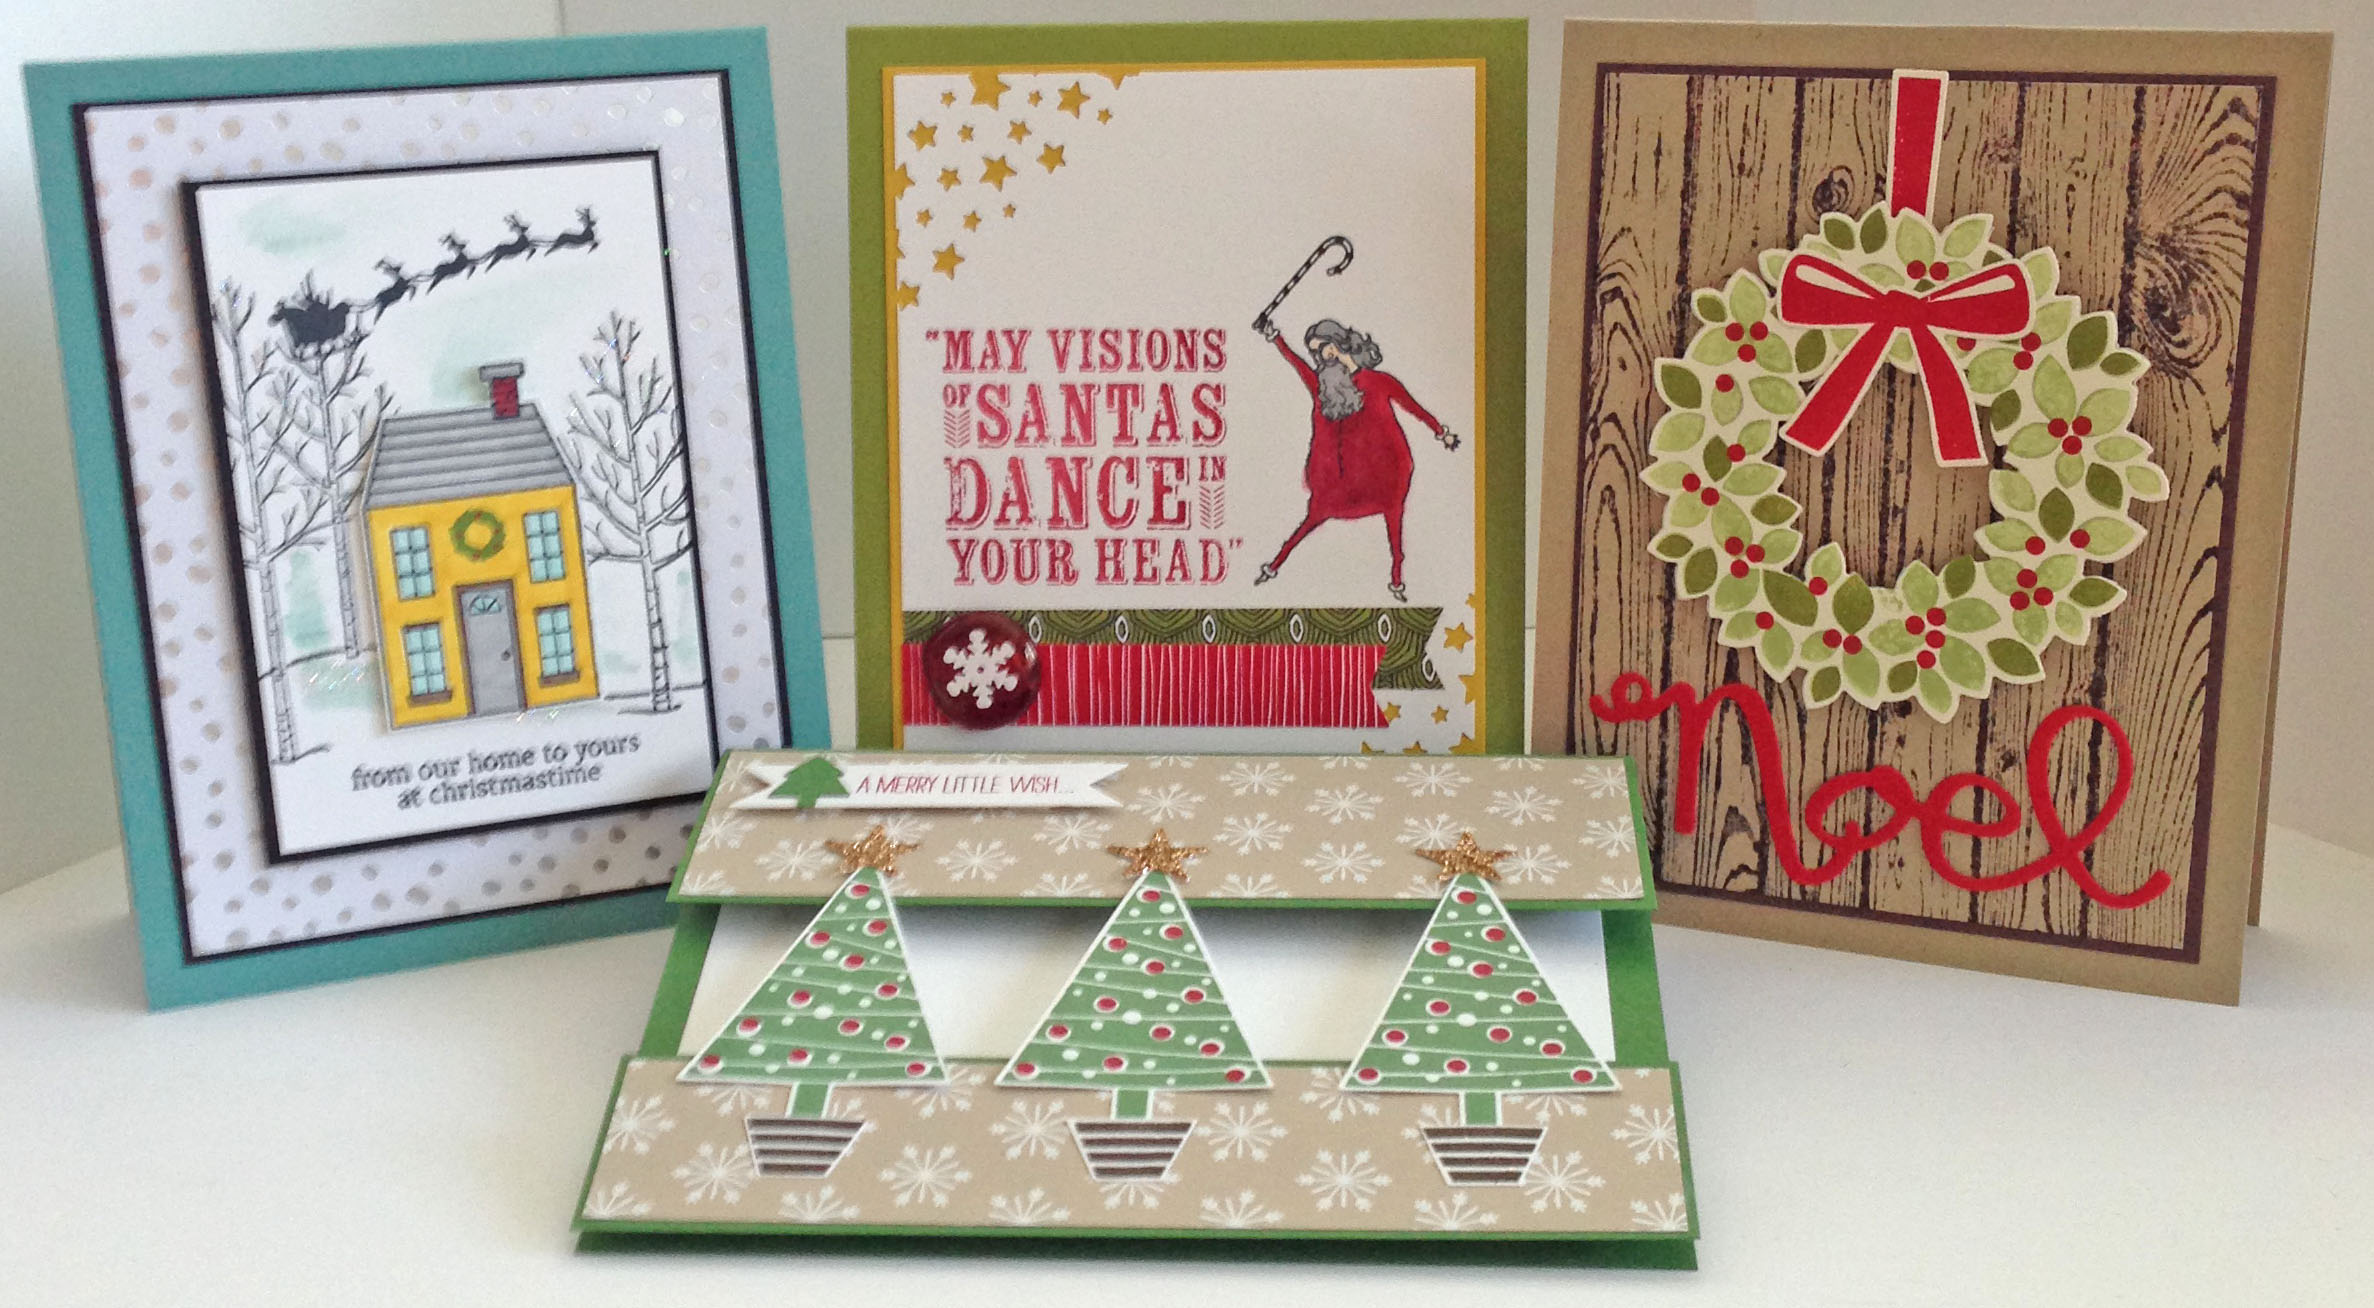 Christmas Cards Class, Part 2!
That's right! Our next class is ready with even MORE Christmas cards, because I was just SO bad with my Holiday Catty purchasing this year! I wanted to make sure everyone got a chance to try the full range of holiday delight that Stampin' Up! has brought us this year, lol... Class is announced for Saturday, October 18 at 3 PM, and Thursday, October 23 at 6:30 PM. As always, if you need a different day and time, just let me know and I will make it happen for you! Snacks and treats will be waiting - RSVP today! 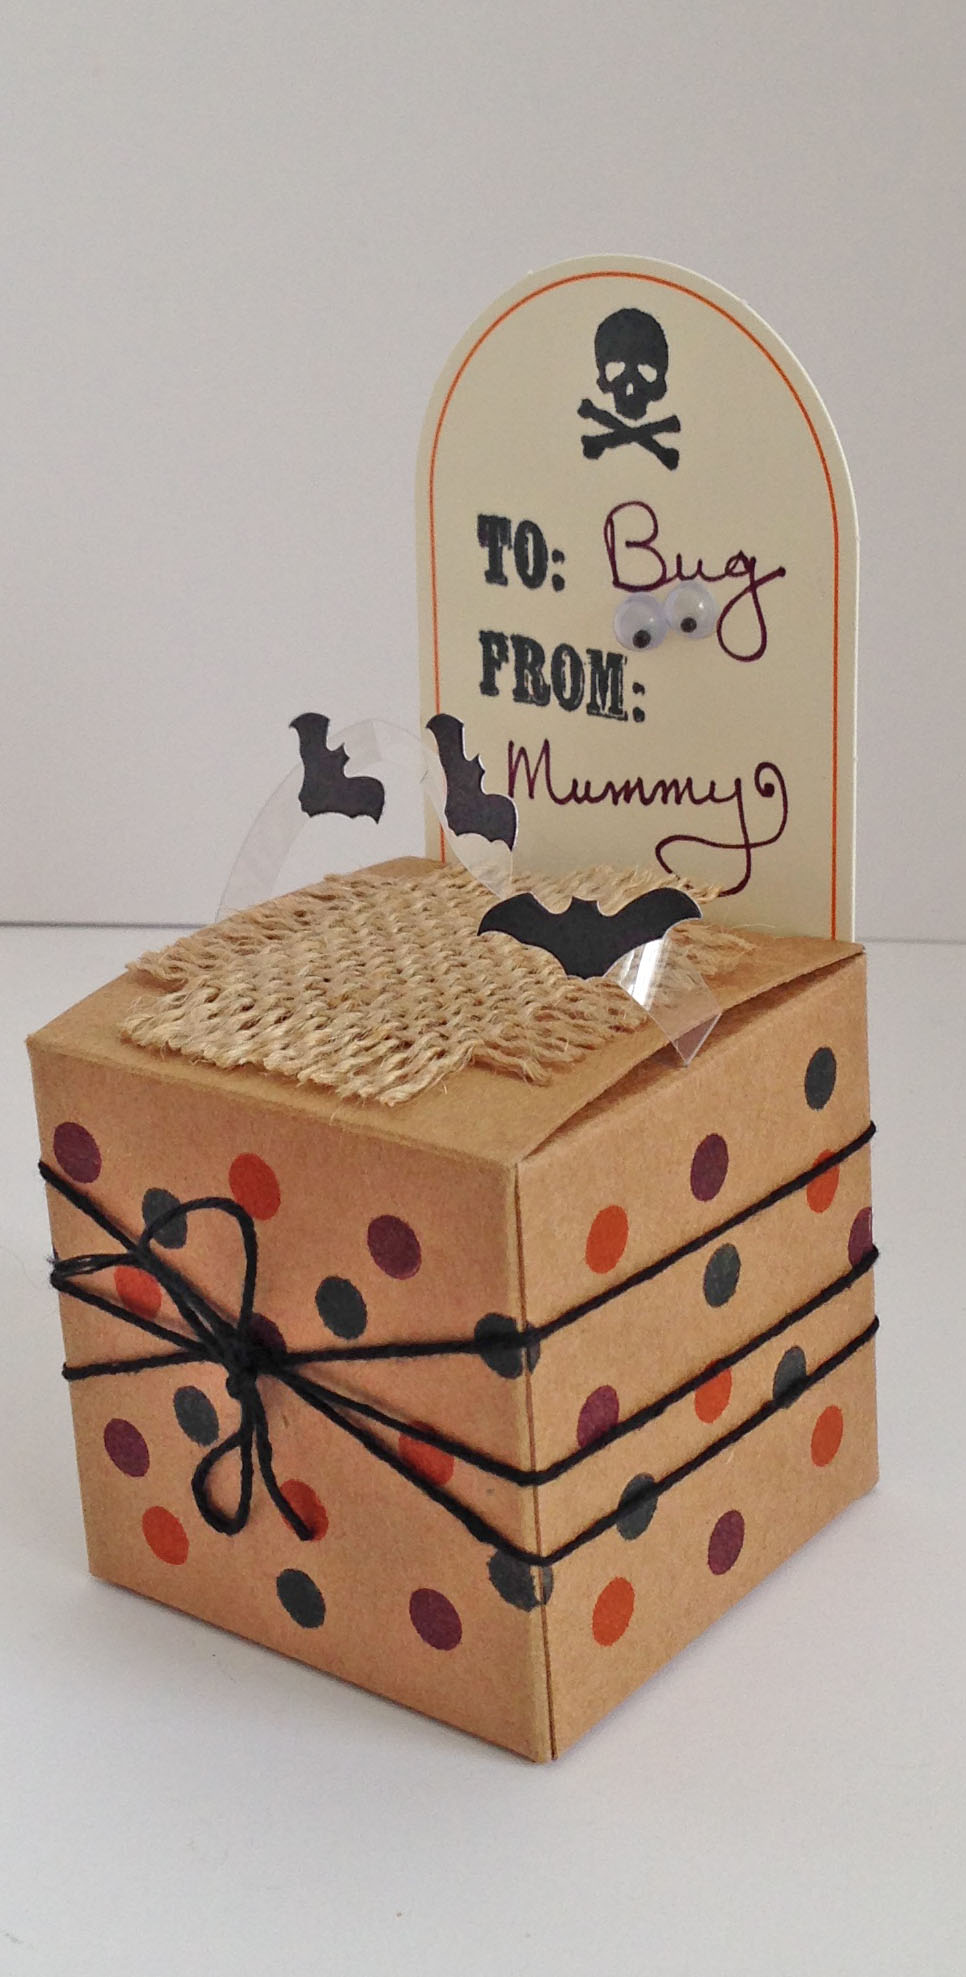 Time for another yummy with My Pumpkin Challenge #1014 - Sweets & Treats! So, Halloween is a pretty big deal in our house - we're that neighbor you live in dread of, with crazy decor and motion-activated spooky noises and jumping spiders, crawling hands...you get the idea! And wait'll you see our latest addition, an 8 foot black and white stripey spider with a light-up butt! He's hanging over our front door - my goal is to get to keep ALL the candy this year because the kids will be too scared to come to the house, lol... Anyway, we also started with our after-school spooky treats this week (gummy eyeballs, anyone?) and I decided a little grave-yard humor (yuk-yuk) was in order! I thought the pretty curvy tag could look just like a headstone when upright like this, and swooshing bats are are just the right finishing touch! Hint: make your bat trajectory by slicing off a 1/4" strip from one of your window sheets, bend one end under your box lid (I used the new Tiny Treat Boxes) give it a twist, and afix the other end under the other side. Adding the twist lets the bats show from the front and flutter all over! Paper Pumpkin Boo-tiful Bags; plus Tiny Treat Box; Seriously Amazing dot stamp; Basic Black, & Blackberry Bliss Inks; Googly Eyes; Blackberry Bliss Marker; Window Sheet Scrap. 
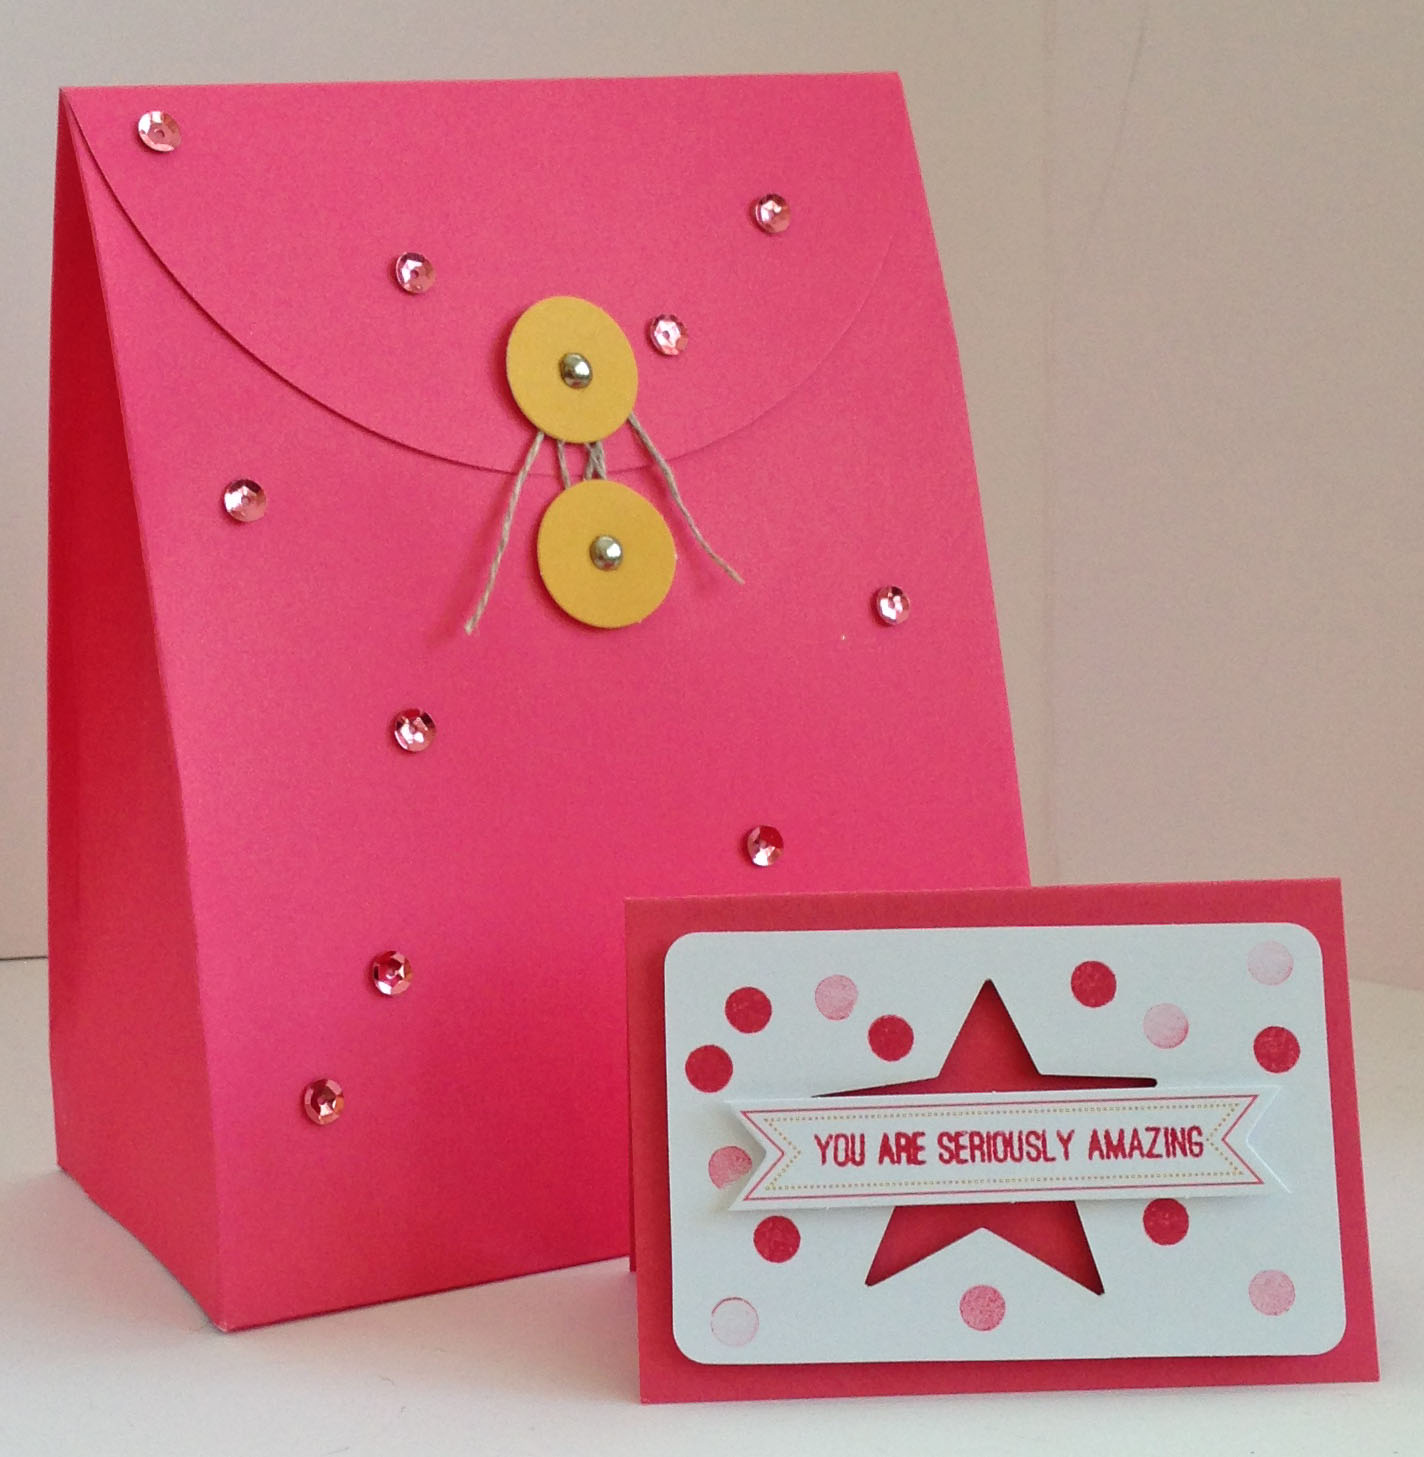 You know what I found out from this month's My Pumpkin Challenge #0914 - What Makes You Smile? I smile I LOT! This week, I am smiling about my hard-working, brand spankin' new high school freshman, who has been seriously busting her butt and taking names, too! My little introverted grade-schooler is blossoming into a mature and fun-loving young lady, joining after school clubs, making new friends - stretching her wings! All while keeping up the grades - yeah! In our house, THE academic reward of choice is your own personal jar of Nutella, and is usually reserved for finals week. My little MVP has earned a mid-term jar! I'm so proud of you, bug! Good thing I could whip up a sparkly strawberry gift bag for you! Hint: I used two of the envelopes from this month's kit, adding a piece of matching CS for the gaps left in the bottom. So easy! Paper Pumpkin - Seriously Amazing; plus, Strawberry Slush CS & Ink.   Pumpkin Club September 27!
Did you get your September Pumpkin kit yet? Spooky! (Just a note, SU! tells me they're running a little late - DON'T PANIC! They'll be here JUST in time! Watch the video to see what's coming!) I hope you can join us for our next Pumpkin Club, Saturday, September 27, 3 pm, chez Heroldt - RSVP to let me know you are coming! Club is free for my subscribers, and includes any extra supplies you might need, drinks and snacks! Let's take this Pumpkin out to play! You're going to LOVE our projects! Remember to subscribe here if you haven't already - sign up by October 10 and you can join us in time for next month! 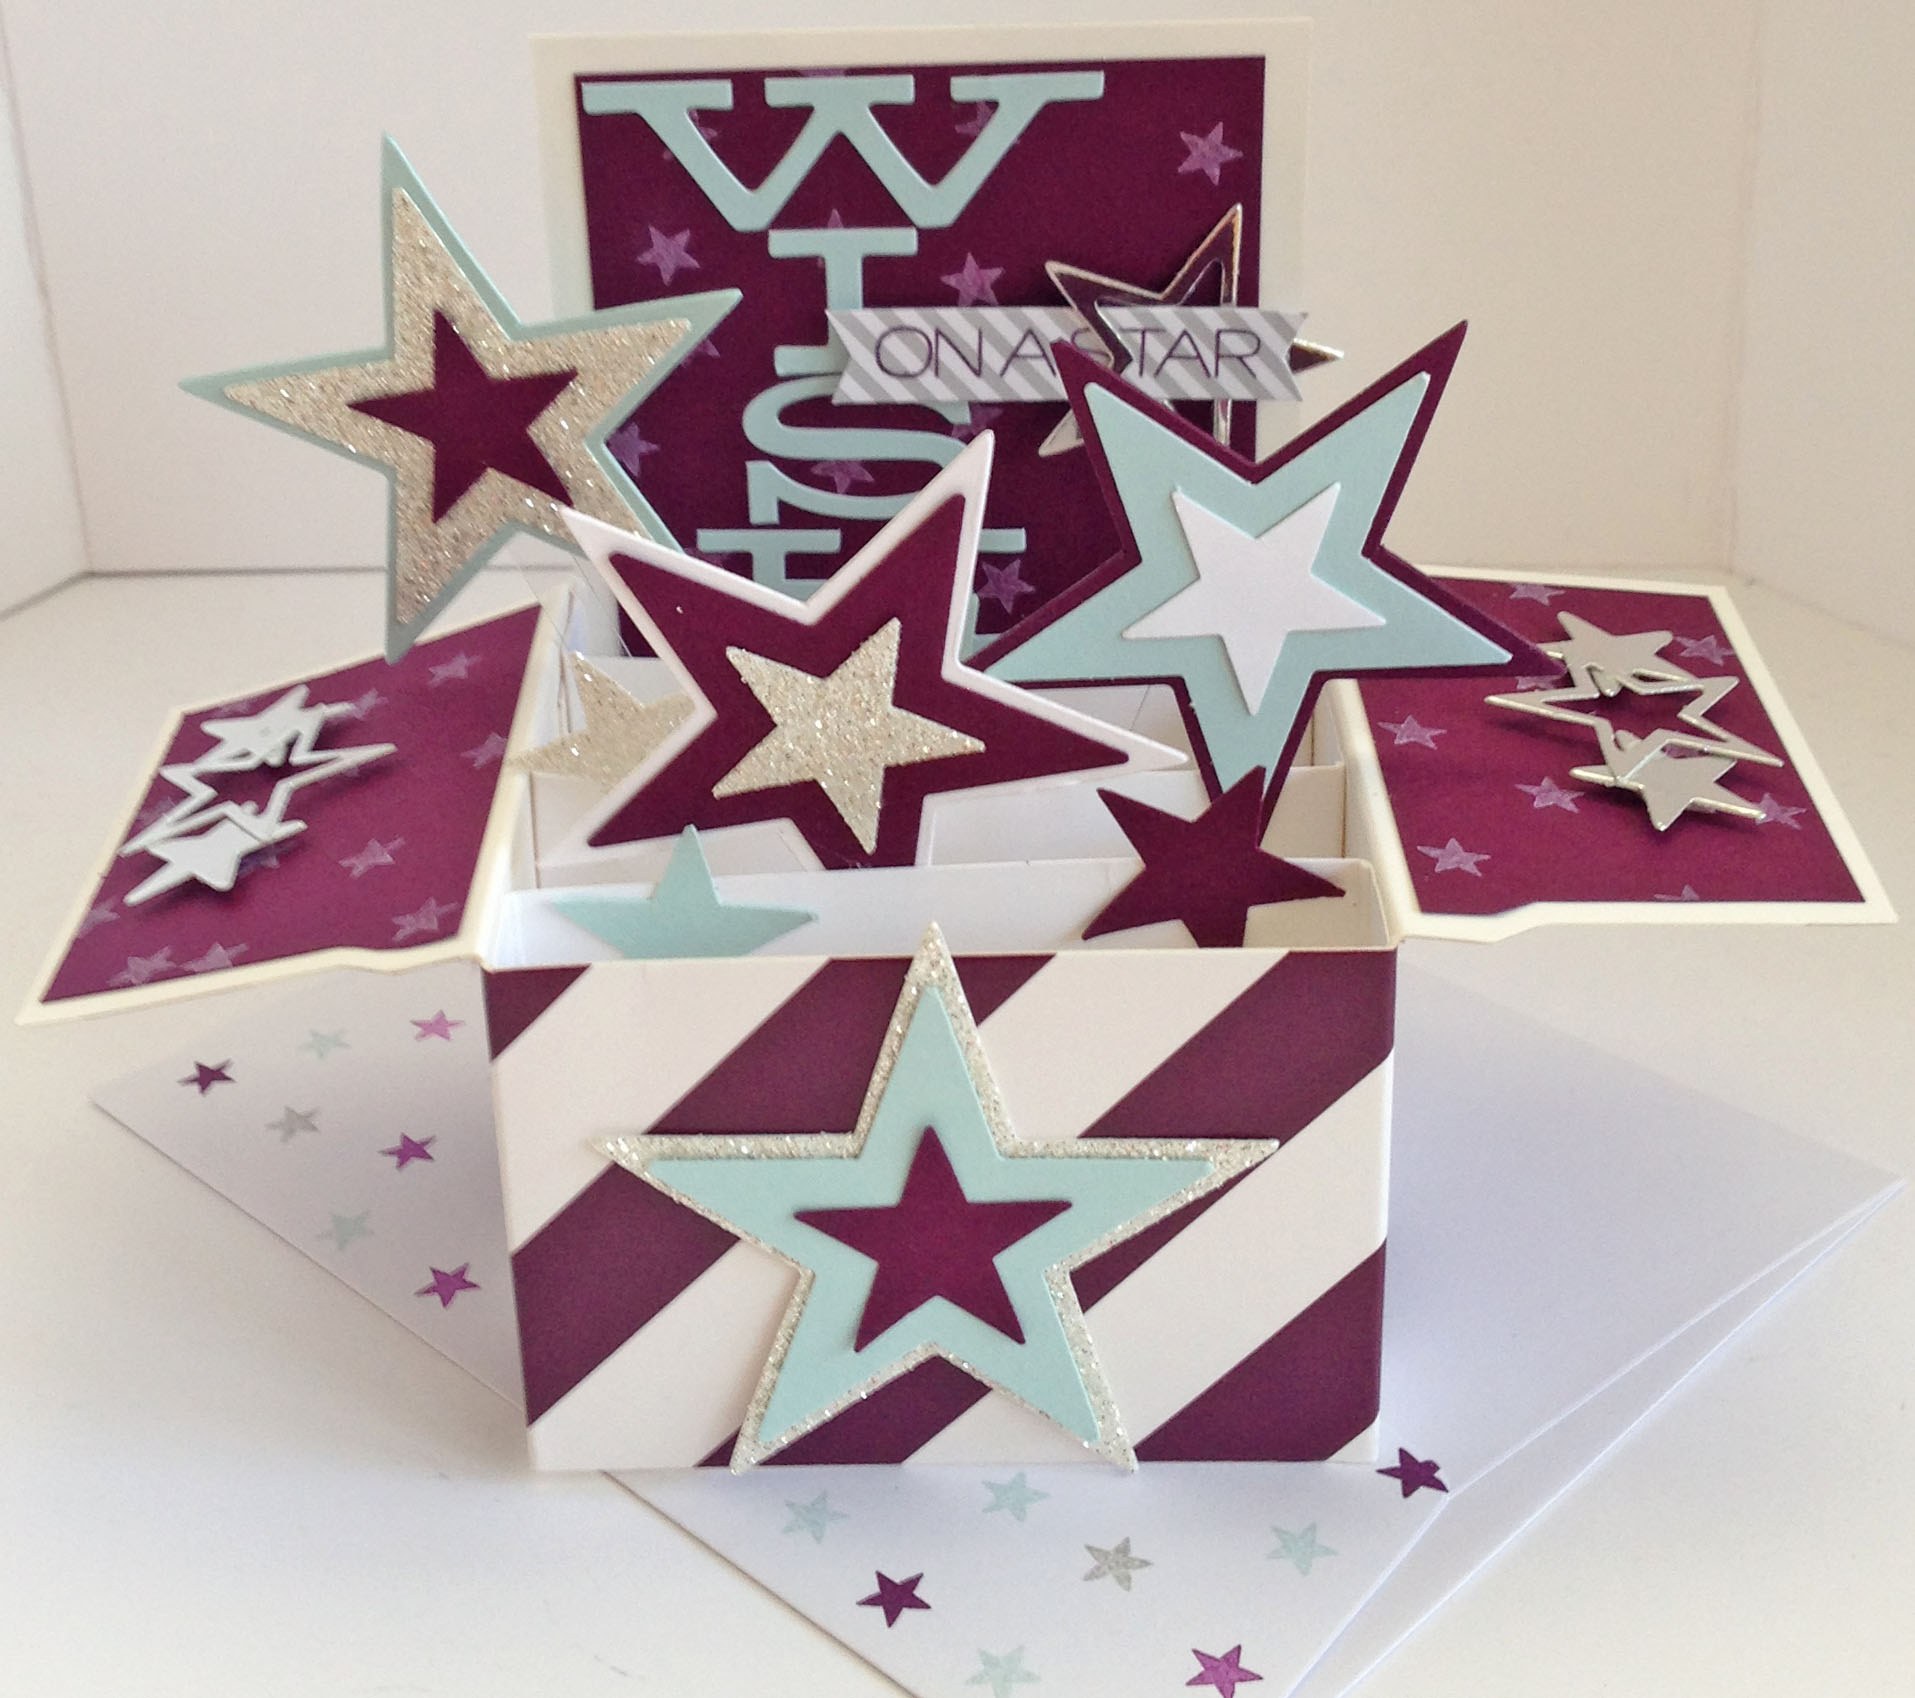 The stars are out for this week's My Pumpkin Challenge #0814 - Wishes & Stars! So, we did a version of a pop-up card in our Pumpkin Club back on July 26, but I wanted to take another crack at it. We need a version that fits better into a regular envelope, AND I wanted to make this baby EXPLODE with stars, lol! This is the result... To get the right size to fit one of the envelopes in the kit, keep your box folded flat while you do some trimming. Cut off all the bottom flaps along the bottom edge, and trim off the lid flap so that the box is 4 1/4" wide. I'd save these pieces to play with later, lol! Cut a piece of Blackberry Bliss to 2 1/2" x 4", and a piece of Whisper White to same size. These will be your "upright" pieces, blackberry in front, and white on the back for your handwritten note. (I stamped "Happy Birthday" from the kit on mine.) Cut two strips of Blackberry Bliss at 1 1/2" x 2 3/4" for the side flaps. I used the edge of the flaps to trace the shape and trim. I randomly stamped all over the Blackberry Bliss pieces in Whisper White with the tiny star stamp from the kit, then decorated the envelope flap the same way with Blackberry Bliss, Soft Sky & Smoky Slate. Add your self-adhesive "wish" to the back, and stamp and adhere "on a star," too. I put in three cross-braces at 3 3/4" x 5/8", scored a 1/2" on each end, and distributed them evenly across the open space. Using the same mix of papers, I punched stars of various sizes and mounted on clear strips. Voila! (Hint: if you keep your kit stamps in a stamp case, you can use the clear backing sheet to cut up for the strips for pop-up boxes!) Wish Big Paper Pumpkin; plus, Soft Sky, Blackberry Bliss, Whisper White & Silver Glimmer CS; Soft Sky & Smoky Slate Inks; Large & Small Star Punches; Movers & Shapers Star Die.  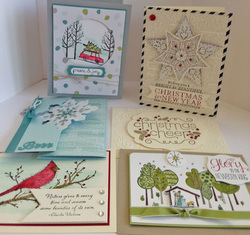 Can you hear jingle bells?? I've been hearing them all week! I am SO excited to announce our August classes: Christmas Cards! I have had such a blast putting this class together, and have tried to offer six very different designs to help inspire you for your own card giving plans! Classes are being offered for Saturday, August 16, 3 pm or Thursday evening, August 21, 6:30 pm. This class costs $25, and includes all supplies for the 6 different cards shown, an instruction sheet for you to keep, your own copy of the new 2014 Holiday Mini Catalog, snacks, libations and MUCH merriment! RSVP today for which class you would like to attend! See you soon! 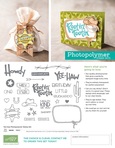 Stampin' Up! is bringing us another awesome new photopolymer stamp set - introducing Yee Haw! This sweet western themed set has 25 amazing stamps in it, perfect for your rootin' tootin' stampin' days! All this for $25.95 - click the image to see the full flyer! (You just KNOW I have to have a stamp set that says, "Rootin' Tootin'!") 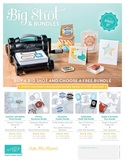 Don't forget our Big Shot & Bundles deal is still going on! With every purchase of a Big Shot in August, you will receive one of five free stamp set/framelits bundles, your choice!
Not only that, but if you already own a Big Shot, you can still purchase these designated bundles at an amazing 15% off! This is one deal you won't want to miss - only available from August 1-31- as these bundles are one-time only exclusives. Click the picture to see the full flyer, and check out the awesome bundles! 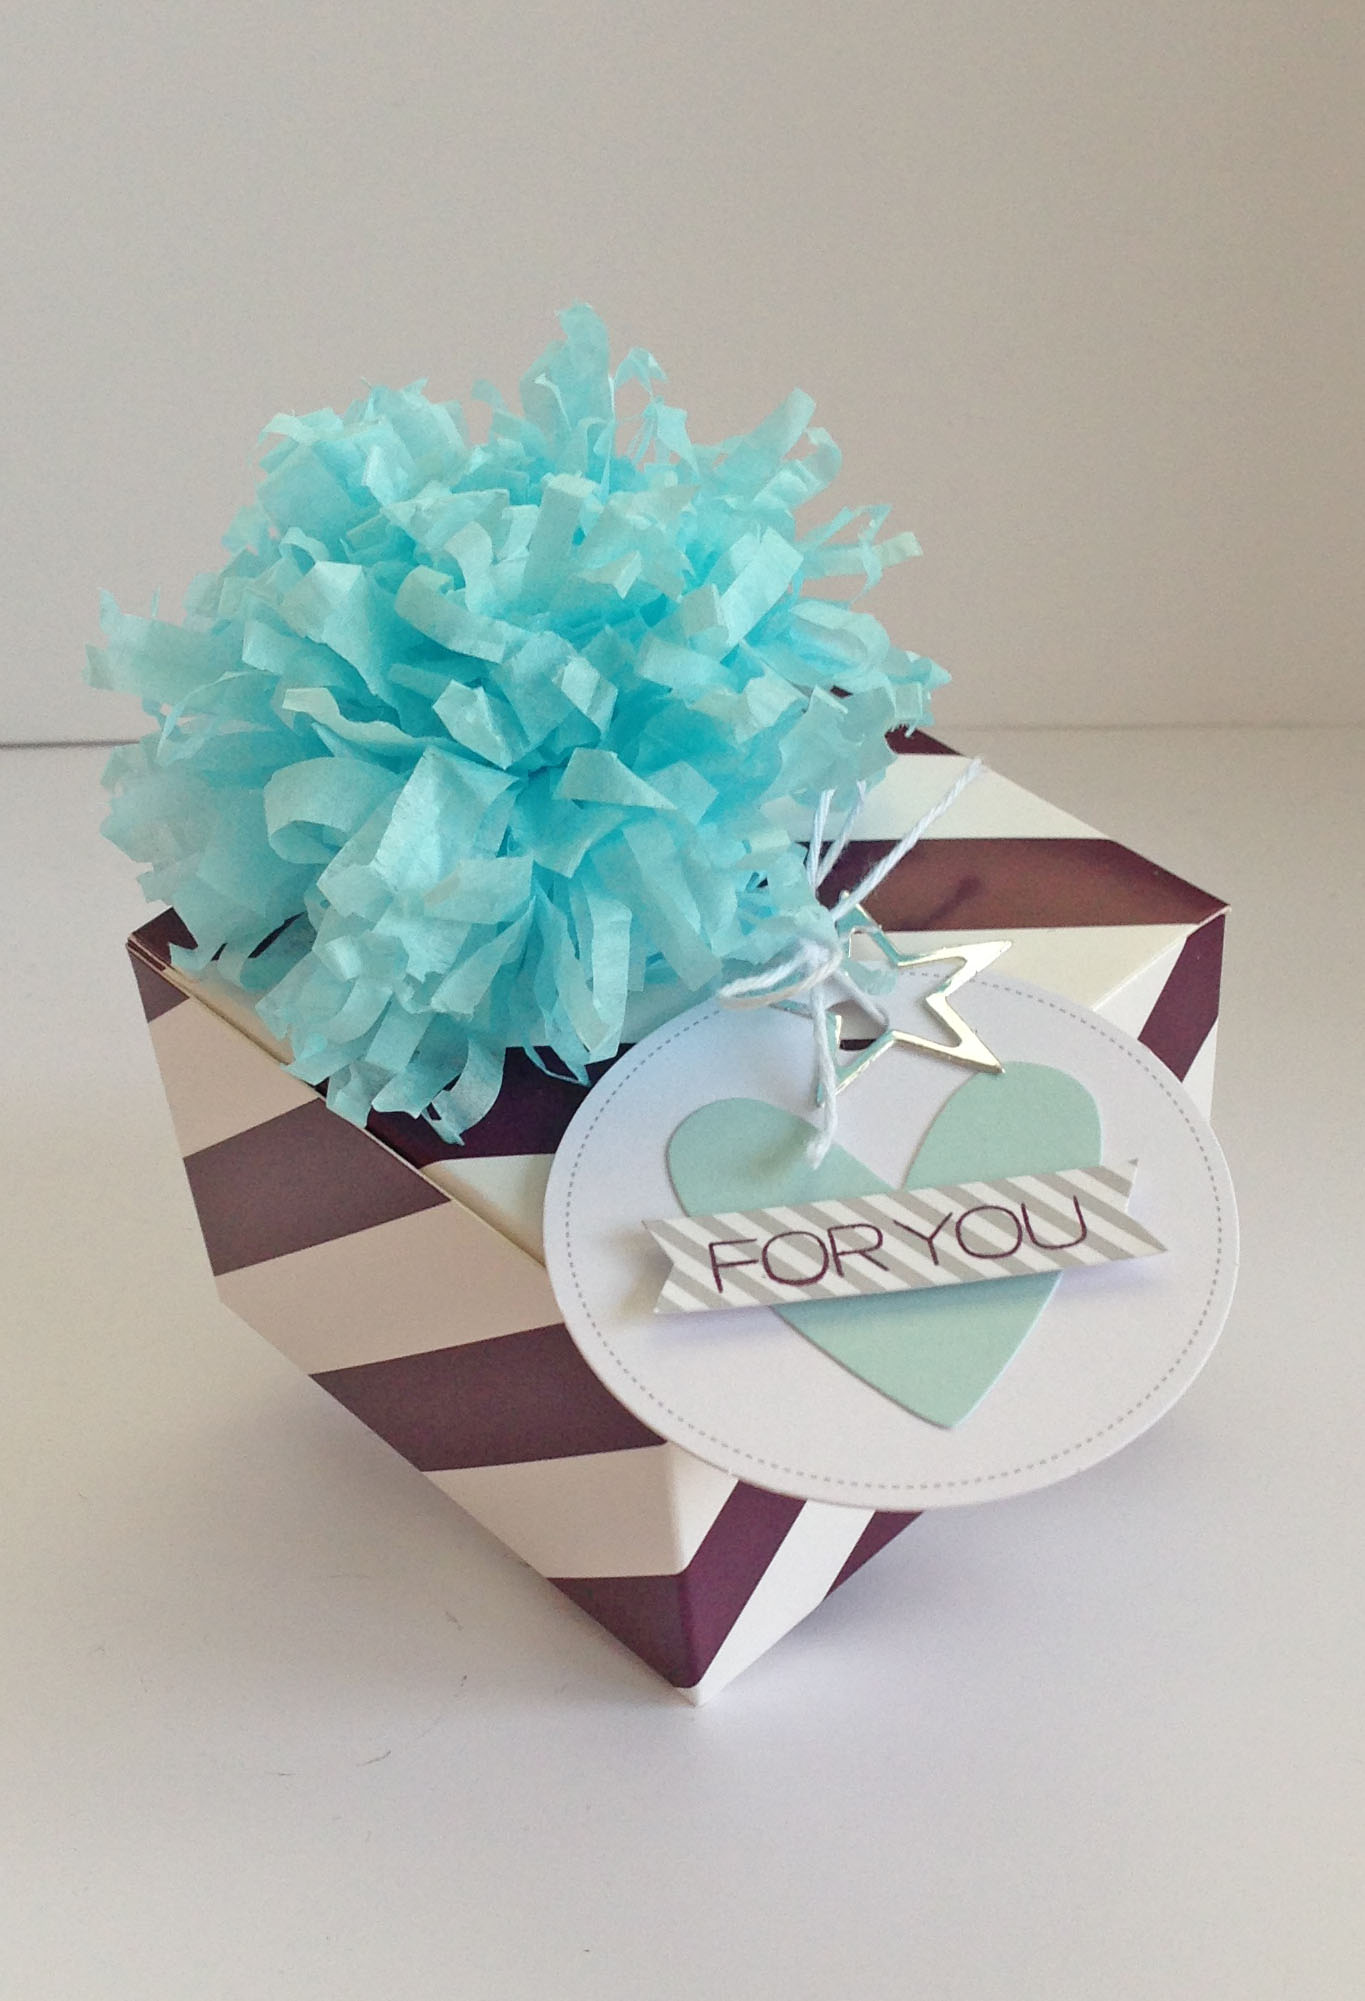 Yay - are you ready for a new challenge this month? I am! Let's get started on My Pumpkin Challenge #0814 - Wishes & Stars! Our Pumpkin Club on July 26 featured our awesome new Paper Pumpkin kit - Wish Big, and for me, was all about looking beyond the basic contents of one's kit for those little extras that knock your socks off! (If you want to get in on our Pumpkin Club action, it's free every month for my subscribers, and chock full of exclusive projects! Visit My Paper Pumpkin today to join!) So, all our fun kits come wrapped in the cutest blue tissue paper, that I have been regretting throwing out since day one. I decided to change all that today! Salvage about 5" wide of a full-length piece of tissue paper. Smooth it out as best you can, but don't fret over the wrinkles, really, it's just tissue paper, people! Fold over one long edge once, maybe about 1 1/2" wide, then twice, creasing sharply. You're going to fold over one more time, so that you have 4 layers of tissue total in one long tube, but run a strip of snail adhesive down the folded edge to help hold everything in place first. Trim off the rest of the tissue and save for another project (hint, hint!) Next, run box tape or maybe Fast Fuse down one edge. I found box tape easier in this instance, so it wasn't sticky while I did the next step, which is... ...Use fringe scissors down the un-adhesived edge of the tissue, cutting gently so as not to rip all that tissue right off, lol. Did you make the awesome Burlap & Blooms Wreath Kit from last year's Occasions Mini Catalog? This is just like the fringed flowers in that kit! Once you're all fringed, peel off the backing from the box tape, and roll up the length into a nice pouf. You have to be careful to not let the fringes get away from you and try to stick to your box tape, it's a job! To mount the flower on my little gift box, I actually pierced the finished blossom's base with a needle threaded with the white Baker's Twine that comes in the kit, and tied it on, along with the tag. You could also hot glue it right on, I suppose. So what are YOUR Pumpkin Wishes this month? Paper Pumpkin Wish Big Kit; plus, Banner Punch (for flagging the sentiment) & Fringe Scissors. 
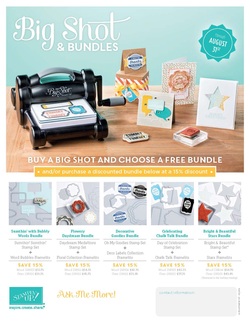 If you're anything like me, you absolutely love when BIG opportunities come your way. And because we all know the Big Shot is a big deal, Stampin' Up! thought they'd offer you something you couldn't miss; an exclusive Big Shot opportunity that lasts for the entire month of August!
I want to put a Big Shot into the hands of every customer before the holiday catalog - full of sweet Big Shot accessories! That's why with every purchase of a Big Shot in August, you will receive one of five free stamp set/framelits bundles, your choice! Not only that, but if you already own a Big Shot, you can still purchase these designated bundles at an amazing 15% off! This is one deal you won't want to miss - only available from August 1-31- as these bundles are one-time only exclusives. Click the picture to see the full flyer, and check out the awesome bundles!  Time for one last round of parties at My Pumpkin Challenge #0714 - Celebrate! So, I finally got around to that spinner card I promised back at our last Pumpkin Club - how could we have such an awesome pinwheel kit and not make them spin on a card?? I also decided to play with my card shape on this one - and use my envelope punch board to make a custom envelope for it - not that I'll ever mail this beauty, lol... This is definitely destined to join my seasonal hall table decor! Rather than go back over the basic directions for a spinner here, you can go to this link for a Christmas card class we did an age ago, that had a spinning ginger bread man, lol... But here are the extra notes for this card: My card base is 6" x 6", folded in half for a 3" x 6" finished base. For the pinwheel, I cut down the basic pinwheel shape by an inch on all sides, to make it small enough for a card. As it is, it still wants to hang over the card edge when it spins, but that's ok since you have to be holding it up to tilt it back and forth anyway, lol... After you adhere all your spinning apparatus, bend your pinwheel wings up slightly, so it has enough clearance to spin freely... Make sure to get your last Pumpkin Celebrations in - I can't wait to see your creations! Paper Pumpkin Pinwheel Party; plus, Crumb Cake & Whisper White CS; Real Red Ink; Word Window Punch; DSP Paper Stack in Real Red (retired, for envelope.) 
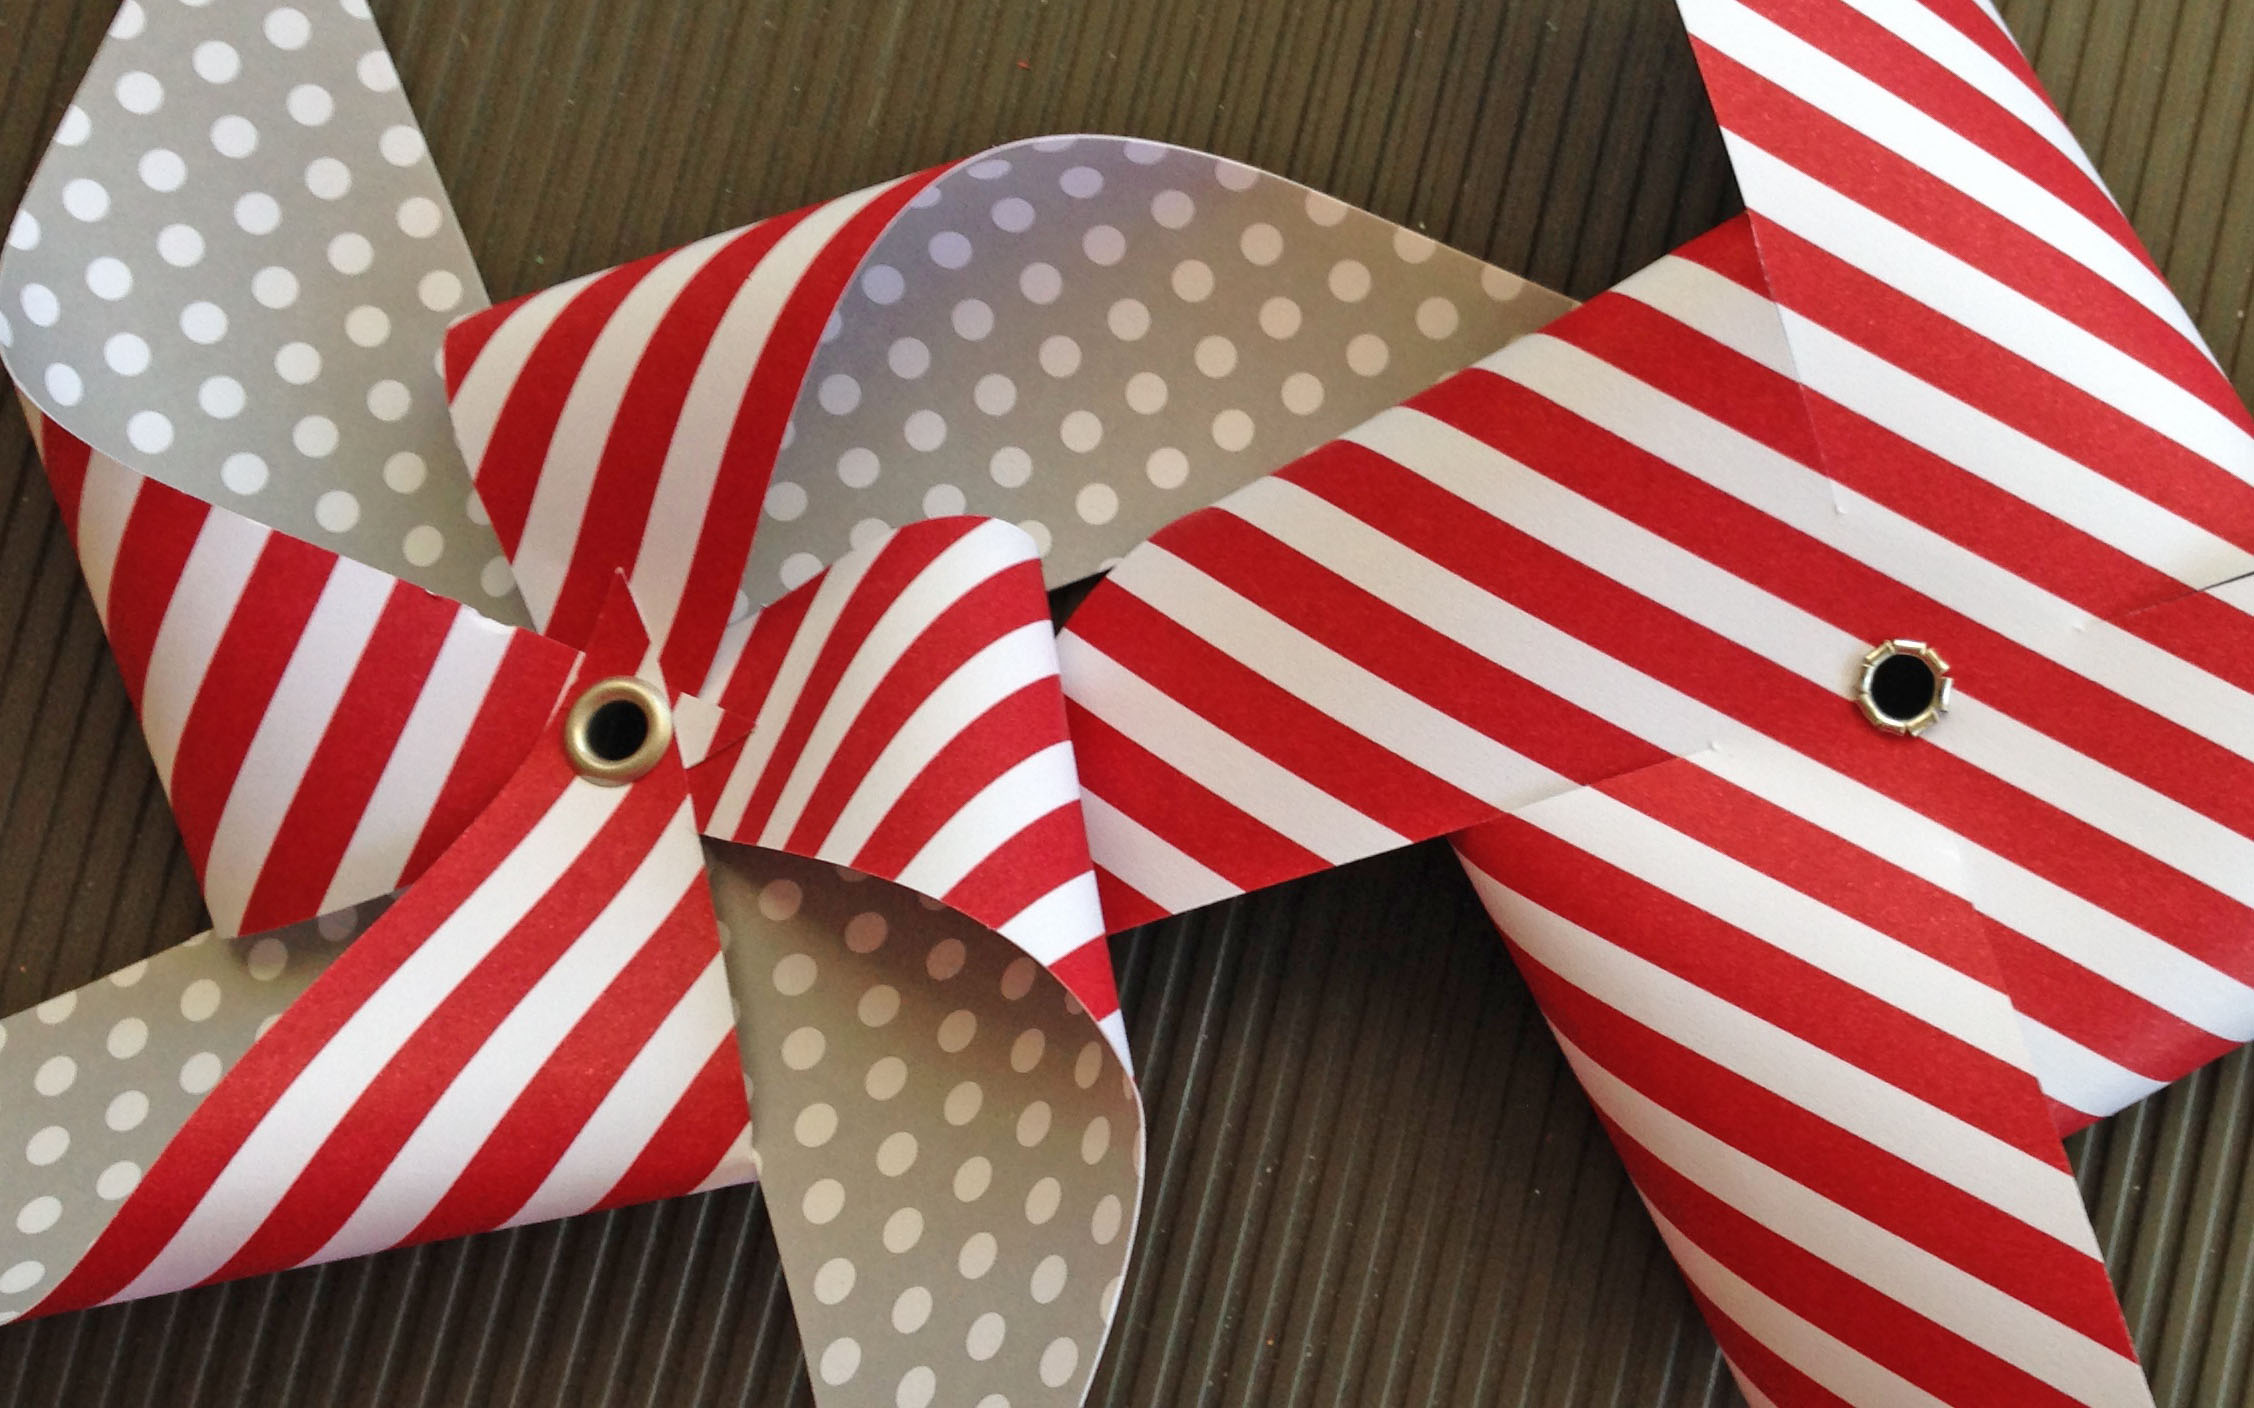
 The celebration continues all month long at My Pumpkin Challenge #0714 - Celebrate! This week, I thought I'd share how I would make my pinwheels actually SPIN, like this beauty that went in the planter by the front door - a DOUBLE pinwheel, lol! I began by fastening my pinwheels using an eyelet instead of a brad - that's half the battle right there! I made all my pre-punched holes a little bigger first, so the eyelet would fit. I actually started out by trying to laminate my pinwheels, since I knew I wanted to put them outside. Not much success here folks - the added weight of the laminate to the pinwheel paper was too much for my little craft eyelets, sigh. Maybe if you have longer shank eyelets this would work? Also, the laminate did NOT like bending - and even after rounding everything with the corner rounder punch, those little corners are SHARP! Yikes! Next, I drilled a tiny 1/16" hole through a dowel I had sitting around, that already had a wooden bead stuck on the end. I have no idea where I originally got these dowels, they look like they're for mini banners or something. But the bead gave a little extra to drill through, so the end of the dowel wouldn't fray or split. Then I made some beads with my Simply Pressed Clay - this is a perfect material for pinwheel making. I remember making pinwheels in preschool that we stuck through pencil erasers, and the Simply Pressed Clay reminds me of that. Make four beads, about dime size in diameter. No need to make holes in them yet, just let them dry solid. Next, snag one of our retired Hat Pins (remember those? I still have ALL of mine, except for one, lol) and string on a clay bead, then your pinwheel, another bead, through the dowel, another bead, the other pinwheel, and the last bead, that has a little dab of hot glue on it to keep everything in place. Don't make everything too tight - these babies need room to spin! Neat trick, huh? I ended up trimming my hat pin down a bit with wire snips, but I bet you could make bigger beads to take up all the room! Paper Pumpkin Pinwheel Party; plus, Simply Pressed Clay; Wooden Dowel with Wood Bead; Hat Pin (retired.) 
 Pumpkin Club July 26! Did you get your July Pumpkin kit, yet? Do they know what Blackberry Bliss fiends we are, or what?? I hope you can join us for our next Pumpkin Club, Saturday, July 26, 3 pm, chez Heroldt - RSVP to let me know you are coming! Club is free for my subscribers, and includes any extra supplies you might need, drinks and snacks! Let's take this Pumpkin out to play! You're going to LOVE our projects! Remember to subscribe here if you haven't already - sign up by Aug 10 and you can join us in time for next month! 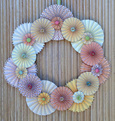 Summer School is Winding Down!
I'm so glad everyone has enjoyed playing catch up with our summer classes! Class is now forming for our Rosette Wreath class! If you want in on what may be our last summer class, let me know and we'll get it scheduled! Class is $20, all supplies included, in a color scheme of your choice. Email today! 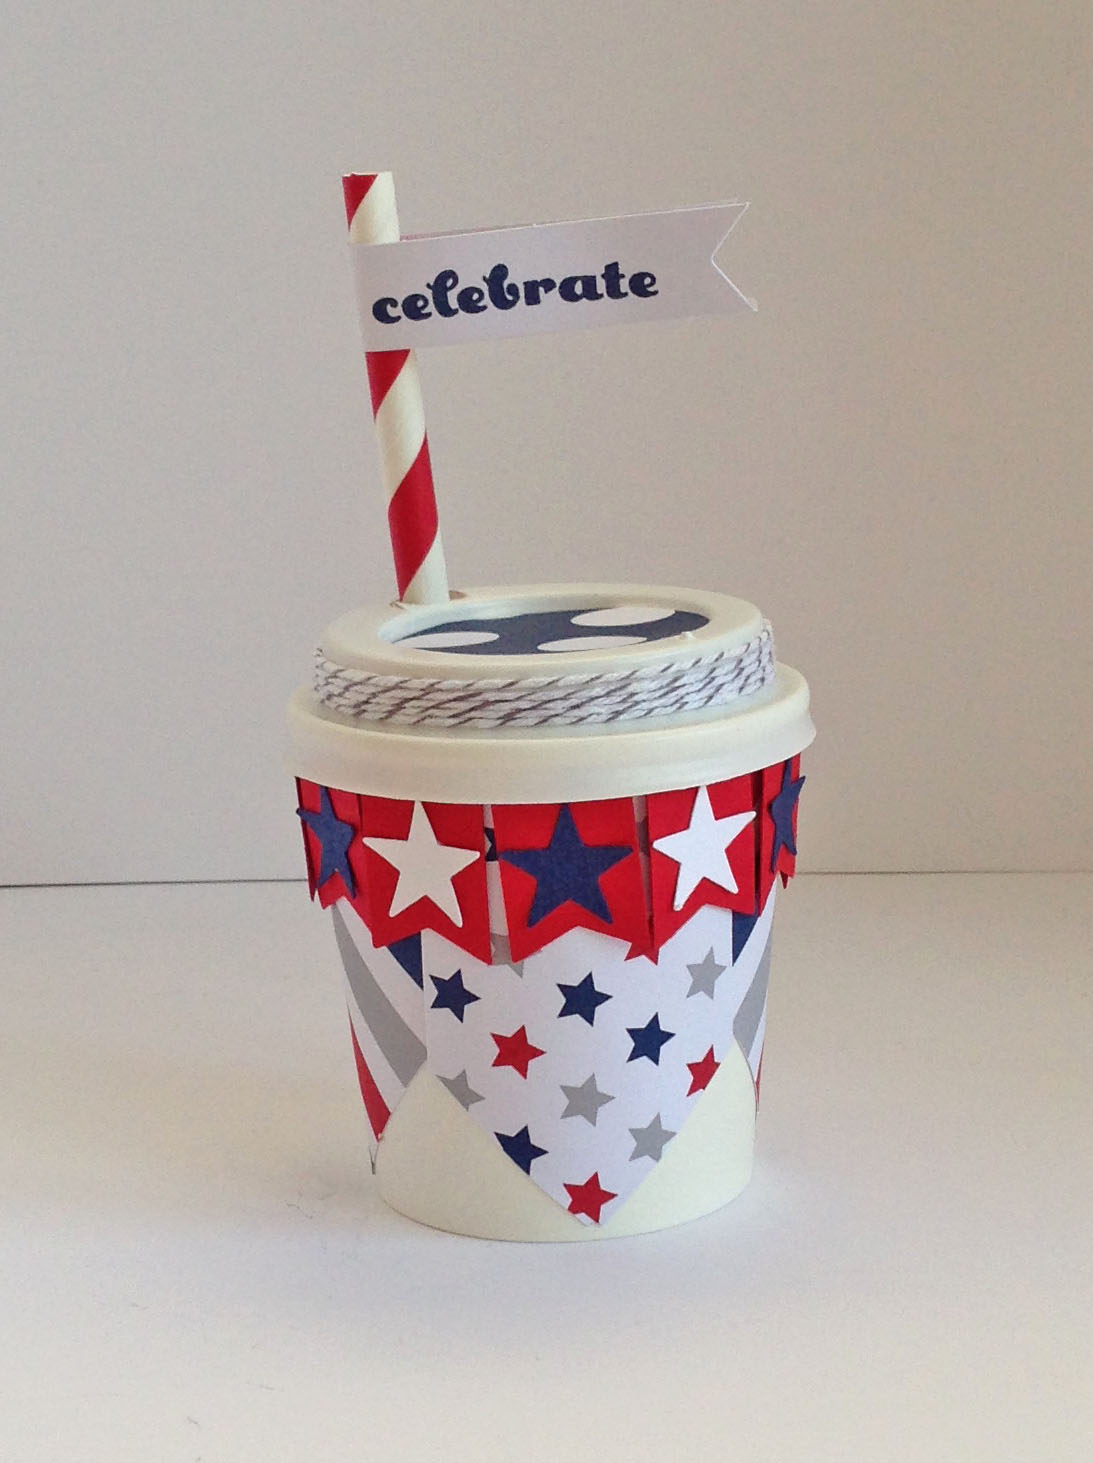 It's still party time at this month's My Pumpkin Challenge #0714 - Celebrate! We had a wonderful weekend for our July 4 holiday - a whole family of friends came to stay, and we had a blast! Lots of fireworks to watch, some pool time, a boat ride (who knew a GoPro video recorder could be so handy??) and of course, excellent barbeque nosh! As an added treat (and please, no one excoriate me, ok?) we got a SMALL supply of legal "fireworks" for the kids to play with on the big day. This being Arizona, it's a short list, lol... Each one received a few sparklers, and a little cache of black powder "poppers," those little paper twists that make a SNAP! noise when you throw them down on a hard surface. Always a fave with the young lads, you know what I mean? At least they weren't fart bombs, thank God! Anyway, I divvied out these treats for everyone into these cute little 4 oz espresso cups, which I of course had to decorate for the occasion! "See, you get this much and NO MORE!" Let's just say it was a hit, and leave it at that. I promise, no household pets were annoyed in the least by this silly party treat! Each cup only needed one pinwheel sheet and half of a straw. I cut the pinwheel into its obvious four triangles, and stacked them all up, flipping two over for contrast. I trimmed off 1" along the long edge on either side of two triangles, and 1 1/2" off the other two triangles, then just glued them to the cup points down. I punched a bunch of banner shapes and adhered with glue dots, and added the stars for extra detail. For the lid, a 1 1/2" Circle punch fills in the indentation perfectly. I also placed two glue dots opposite each other on the lid rim, and wound round the Baker's Twine, adhering as I went - it holds the twine perfectly! Add a straw flag, and you're all set! If you wanted them extra sparkly, a Basic Jewel Rhinestone on each punched star could really punch them up even more! Paper Pumpkin Pinwheel Party Kit; plus, Real Red, Whisper White & Night of Navy CS; 1 1/2" Circle, Banner & Itty Bitty Accent Star Punches. 
 Summer School is OPEN! For the months of June and July, we're still having summer school - your chance to take any past class you want! Browse my past offerings, or describe to me something you remember us doing and then just email me which one you'd like to make up or repeat, and if you prefer day, evening or weekend. We'll schedule just for you, and work around your summer plans! No need to worry about being away for our regular class nights! Once classes are scheduled, I'll post them here, so if anyone else wants to jump in on your choice, they can! 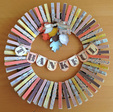 Our Fall/Halloween Clothespin Wreath Class is now scheduled! We'll be getting together on Saturday July 19, 3 pm to put this cutie together! RSVP now if you'd like to join us, and remember that additional dates are available - the beauty of Summer School! $25 all supplies provided, along with yummy snacks and drinks!
|
 About MeWelcome to my blog! I'm a stay-at-home wife, mom and empty-nester, who, in addition to WAY too much volunteering, loves to create, whether it's in paper, fiber or in the kitchen! I live in sunny Scottsdale, AZ. 
April 13, 2 pm
New Catty Preview April 27, 2 pm Pumpkin Club May 11, 2 pm Critter Class May 25, 2 pm Pumpkin Club June 15, 2 pm Man Cards June 29, 2 pm Pumpkin Club Don't forget to RSVP and bring a friend for a special gift! 

Categories
All


This content is the sole responsibility of Heather Heroldt as an independent Stampin' Up! demonstrator and the use of and content of the classes, services, or products offered here, on my DBWS, or any other Internet medium is not endorsed by Stampin' Up! All Stampin' Up! images used for my projects are copyrighted to Stampin' Up!, and used with permission under their Angel Policy.
Archives
April 2024
|
 RSS Feed
Proudly powered by Weebly